Grand Canyon Trip Advisor | Best Views & Hiking Trails
Grand Canyon Travel Guide: Things to Do in 2026
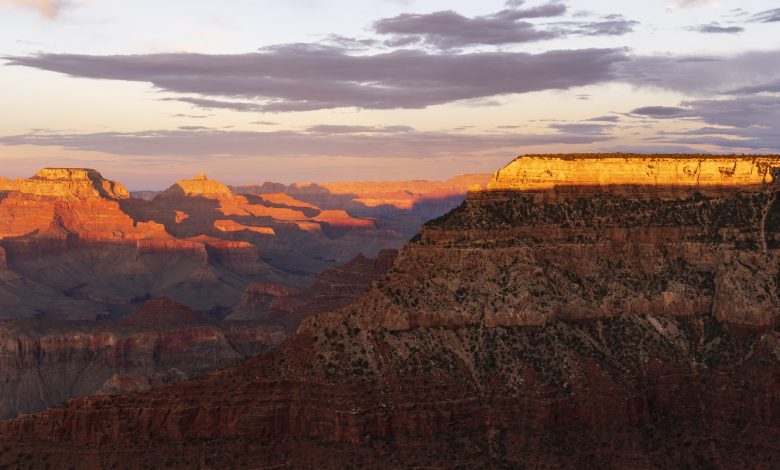
The Grand Canyon is not a single overlook: it is a vast landscape where rim viewpoints, below-rim trails and remote drives require very different plans. For a first visit, choose a rim, allow at least two full days if possible, and check National Park Service (NPS) alerts before you travel. The South Rim is open year-round; the NPS reports that selected North Rim areas reopened for the 2026 season, but access and services vary. Check the live Grand Canyon conditions page and what is open today before setting your route.
Featured image credit: Mgimelfarb, “Grand Canyon South Rim at Sunset,” CC0, via Wikimedia Commons.
At a glance: choose the visit you can actually manage
| Your priority | Practical plan | Check before departure |
|---|---|---|
| Views with limited walking | Visitor-area overlooks and a manageable paved rim section. | Accessible facilities and shuttle stops for your needs. |
| A first below-rim walk | A short out-and-back with an early turnaround. | Today’s hiking messages and drinking-water availability. |
| Photography | One overlook with enough time to return safely. | Layers, a light and a return route behind barriers. |
Bad-weather alternative: wind, snow or poor visibility can change the day. Keep a visitor-area option and avoid committing to a long exposed walk solely because it appears on an itinerary. Check the relevant road, hiking and shuttle notice rather than relying on an old screenshot.
How much time should you allow?
One day is enough for a scenic introduction from the South Rim, but it is not a canyon hike. Two days allow a slower rim walk, visitor-area stops and one short trail chosen for your fitness and conditions. Add more nights for longer hikes, a permit-based backcountry trip, or a visit to both rims. The North and South Rims are not convenient side trips from one another: check the current road route and distances before treating them as a combined itinerary.
A realistic two-day South Rim itinerary
Day 1: orient yourself and walk the rim
Start at the South Rim visitor area, check ranger updates, trail messages and shuttle operations, then explore a manageable stretch of the Rim Trail. Use the park shuttle where it is operating rather than repeatedly moving your car between viewpoints. In the afternoon, choose one west-facing overlook for changing light and leave enough time to return before services wind down. Download maps and any NPS app content in advance in case mobile coverage is weak.
Day 2: choose one outing, not a checklist
Begin early, when temperatures are generally more manageable, and select either another rim section, a short below-rim hike or a drive toward Desert View if the road and facilities are open. Build in water, food and rest stops; a flexible plan is more rewarding than trying to reach every viewpoint. Check the NPS alerts again that morning because road, water and facility conditions can change.
Hiking below the rim: plan the climb back
Descending can feel easy while the return climb is strenuous, especially in heat. A short distance on a map can take much longer than expected. Read the NPS Hike Smart guidance and current hiking messages, carry adequate water and food, start early, and turn around before you are tired. Do not plan a casual day hike to the river and back. For overnight hiking, permits and current backcountry rules are essential.
Where to stay and how to get around
Staying inside the park makes sunrise and early trail starts easier, but book through official channels and confirm cancellation terms and current availability. Tusayan is close to the South Entrance; Williams and Flagstaff offer other road-trip bases but add driving time. Compare the full itinerary, not just room rates. The South Rim shuttle links parking areas, overlooks, trailheads and village services when operating; review its current routes and seasonal timetable before relying on it. Keep offline directions and bring layers, sun protection and snacks.
Booking priorities and common mistakes
First confirm your dates, rim and overnight base. Then check lodging or campground availability, entry information, any backcountry permit, and current shuttle and road details. Avoid assuming that a North Rim visit works like a South Rim stop, that all services operate every day, or that water is available along every trail. Never cross barriers for a photo, approach wildlife, or descend farther than you can safely climb back.
For a wider road trip, compare this park visit with our Los Angeles guide and Las Vegas guide for a possible regional starting point, or browse the North America planning hub. The best next step is to choose your rim and check the NPS daily conditions page before booking non-refundable transport.





2 Comments